

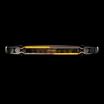


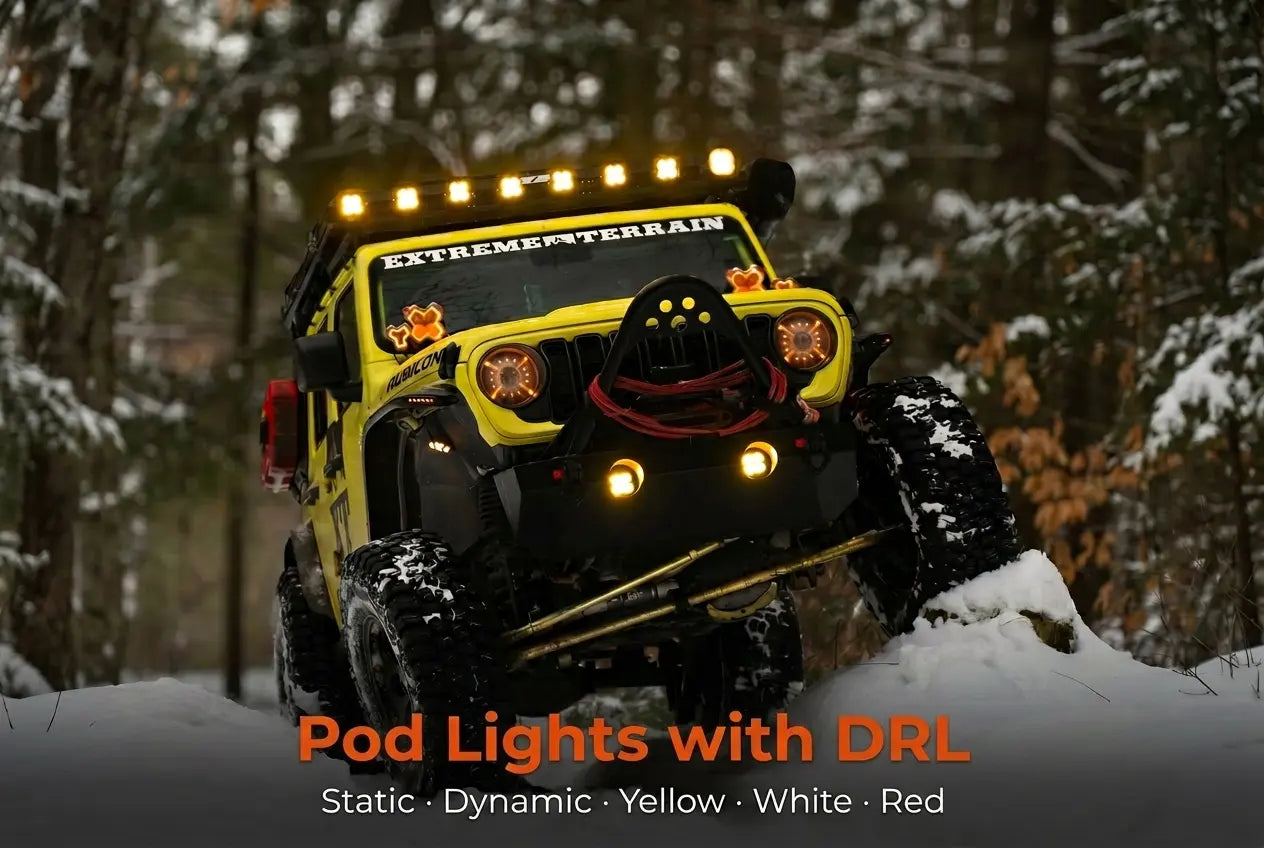
If you've seen a truck or Jeep on trail with a set of lights tucked into the hood near the windshield — pointed outward rather than straight ahead — those are ditch lights. They fill a specific blind spot that your headlights and bumper-mounted pod lights both miss: the sides of the trail directly in front of you.
This guide covers everything you need to know before buying and mounting a set: what ditch lights actually are, which vehicles support them, how to pick the right beam pattern, and how to wire them cleanly into an existing lighting setup.
What Are Ditch Lights?
"Ditch" in American road terminology refers to the drainage ditches that run alongside highways and rural roads. Ditch lights get their name from exactly what they illuminate: the ditch area on either side of the road or trail ahead of you — the zone your headlights don't reach because they're aimed straight forward, and your bumper pods don't reach because they're mounted too low and too centered.
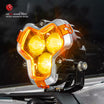
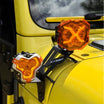
The mounting position is the hood crease near the base of the A-pillar — the natural folded edge that runs along both sides of the hood on most trucks and SUVs. A bolt-on bracket attaches here and positions the light angled outward at roughly 20–30 degrees from straight ahead. The result is a beam that covers the side-forward zone: the area between your headlights' straight-ahead throw and your peripheral vision.
Why this position matters
Consider what happens when you're moving at moderate speed on a winding trail at night. Your headlights illuminate the road ahead. Your bumper pods extend that reach further down the same line. But the moment the trail curves, or an animal steps out from the tree line at an angle, or you're approaching a blind corner — nothing is illuminating that side-forward zone until you've already turned into it.
Ditch lights solve this specific problem. They're not a replacement for headlights or bumper pods — they're a third layer of illumination that covers the gap between straight-ahead lighting and what's coming up on the sides.
Other names for the same thing
Depending on the community and vehicle, you'll hear these terms used for the same mounting position and purpose:
- Ditch lights — most common in the truck community (Tacoma, F-150, Silverado)
- A-pillar lights — more common in the Jeep community, where the mount is on the A-pillar itself rather than the hood crease
- Hood lights — casual term used across platforms
- Cowl lights — technical term, less common in everyday use
Ditch Lights vs Bumper Pod Lights: Do You Need Both?
This is the most common question, and the short answer is: they're not competing — they're complementary. Understanding what each covers makes it easy to decide.
What bumper pod lights cover
Bumper-mounted pod lights extend your straight-ahead illumination. Mounted low on the front of the vehicle, they throw light forward along the same axis as your headlights — further down the trail, brighter at distance, with beam pattern options that your headlights don't have. They're the right choice when your primary need is more light in the direction you're already looking.
What ditch lights cover
Ditch lights cover the side-forward angle — roughly 20–40 degrees off center on each side. Mounted high near the A-pillar and angled outward, they illuminate trail edges, corners, approaching intersections, and anything coming from the sides. They're the right choice when your primary need is awareness of what's beside and slightly ahead of you.
When one is enough
- Bumper pods only: highway driving, open desert, straight-line trail running where forward distance is the priority
- Ditch lights only: winding forest trails, technical terrain with frequent direction changes, any scenario where side awareness matters more than raw forward distance
When both make sense
Running bumper pods and ditch lights together gives you complete front-hemisphere coverage: forward distance from the bumper pods, side-forward awareness from the ditch lights. This is the setup most serious overlanders and trail runners end up with. It requires a switch panel to manage both pairs cleanly, but the coverage difference is significant.
Which Vehicles Have Ditch Mount Positions?

Most body-on-frame trucks and off-road SUVs support ditch lights, but the mount style varies by platform.
Trucks with natural hood creases (bolt-on bracket)
These vehicles have a pronounced fold line running along the hood that serves as the natural ditch mount point. A bolt-on bracket attaches directly to this crease without drilling:
- Toyota Tacoma (2nd, 3rd, 4th gen) — the most popular ditch light platform; numerous aftermarket brackets available
- Ford F-150 (2015+) — strong aftermarket bracket support across all trim lines
- Chevrolet Silverado / GMC Sierra — bracket availability varies by generation; confirm fit before ordering
- Toyota Tundra — supported; fewer bracket options than Tacoma but well-covered by major aftermarket brands
- Toyota 4Runner (5th gen) — supported via hood crease bracket
Jeep (A-pillar mount)
Jeep Wrangler (JK, JL) and Gladiator owners typically mount pod lights directly on the A-pillar using a clamp bracket rather than the hood crease. The A-pillar is accessible, structural, and positions the light at a similar angle. The terms "ditch lights" and "A-pillar lights" are often used interchangeably in the Jeep community. Bronco builds frequently follow the same approach.
Vehicles that require custom brackets
Some platforms — including older-generation trucks, certain SUVs, and import platforms — don't have a pronounced enough hood crease for standard ditch brackets. These builds typically require a custom fabricated bracket or a universal roof/hood mount solution. If your vehicle isn't listed above, check with bracket manufacturers (Baja Designs, Rigid Industries, and several Tacoma/Jeep-specific shops offer fitment guides) before purchasing.
Beam Pattern: Why Combo Leads for Ditch Setups

Beam pattern is the most important spec decision for ditch lights — more important than wattage or lumen count. Here's why combo dominates, and when spot makes sense instead.
Combo beam: the right choice for most ditch setups
Combo beam combines a focused spot core with a wider flood fill around it. Mounted in the ditch position and angled outward, a combo beam does exactly what you need: it throws light far enough down the trail to give you reaction time, while the wider fill illuminates the immediate side-forward area at the same time.
This is why combo is the most popular choice for ditch lights across all platforms. The ditch position already narrows your forward coverage compared to a bumper mount — a combo beam compensates by spreading the available light across a wider angle rather than concentrating it in a single spot. The result is better overall side-forward awareness without sacrificing useful distance.
The NOVSIGHT HALO Standard 3-inch in combo mode, mounted in a ditch position, gives you both the near-field side coverage and enough forward throw to illuminate what's coming before you reach it. It's the configuration we see most often and the one we'd recommend as a starting point for any ditch light build.
Spot beam: when it makes sense for ditch
Spot beam concentrates all output into a tight, long-throw column. In a ditch position, this means maximum distance in the side-forward direction — useful on open terrain at speed where you want to see as far as possible to the side-forward zone before the trail curves.
Choose spot for ditch mounts when:
- You run open desert or high-speed off-road where long side-forward distance matters
- You already have adequate near-field coverage from bumper pods or fog lights
- Your terrain is fast and open rather than tight and technical
Driving, flood, and fog: when to consider them
Driving beam offers a middle ground between spot and combo — slightly wider than spot, slightly more focused than combo. It's a reasonable alternative if you find combo too wide for your specific terrain.
Flood and fog beams are rarely the right choice for a ditch position. Flood's wide, short throw is better suited for camp lighting or bumper-mounted rock crawl setups. Fog's low-angle spread is designed for forward visibility in weather — mounted up near the A-pillar and angled outward, it doesn't serve the ditch position's purpose well.
For the HALO Standard 3-inch specifically, the full 5-beam-mode flexibility means you can experiment with different patterns after installation and dial in exactly what works for your terrain — without buying a second set of lights.
Size: Why 3-Inch Is the Standard for Ditch Mounts
Walk through any serious overlanding build or trail rig, and you'll find 3-inch pod lights in the ditch position almost universally. There are three reasons for this:
Weight and bracket stress
Ditch light brackets are cantilevered — they extend out from the hood crease and hold the light in a fixed position against vibration, trail impacts, and wind load at speed. A 3-inch pod light weighs significantly less than a 4.5-inch or 6-inch unit. Over thousands of miles of trail driving, the cumulative stress on a bracket holding a heavier light causes fatigue faster, increases the chance of bracket movement, and puts more stress on the hood attachment point.
3-inch lights keep the weight low enough that quality ditch brackets maintain their position long-term without constant re-torquing.
Viewing angle and coverage
A 3-inch pod light has a smaller physical footprint, which means it doesn't obstruct your forward sightline from the driver's seat. Larger lights mounted in the ditch position can intrude into the driver's peripheral vision — distracting when the lights are on and blocking natural sightlines when they're off.
Output is more than adequate
The HALO Standard 3-inch at 48W and 3,450 lumens per light delivers more than enough output for the ditch position's purpose. Ditch lights are not trying to replace your headlights — they're supplementing with side-forward coverage. At this output level, a 3-inch unit covers everything you need from the ditch position without the weight and size penalties of a larger light.
The HALO SE 3-inch pushes this further at 60W and 6,120 lumens if maximum output in the 3-inch form factor is your priority.
Can you run 4.5-inch or 6-inch in a ditch mount?
Yes, both are valid options with the right bracket setup — and we see customers running both sizes successfully in ditch positions.
4.5-inch: Some platforms and aftermarket bumpers offer 4.5-inch ditch bracket options, and the weight is manageable on quality hardware. The larger lens gives you more output and a slightly wider spread, which some builds prefer for maximum side-forward coverage. Confirm bracket weight rating before ordering, and expect to check torque more frequently than with a 3-inch setup.
6-inch: Less common in ditch positions but used on builds where maximum output is the priority — particularly larger trucks and SUVs where the proportions can accommodate the bigger housing without the sightline intrusion that affects smaller vehicles. The HALO SE 6-inch at 80W and 8,160 lumens per light delivers serious output from the ditch position if that's what your build calls for. The trade-off is more weight on the bracket and a larger physical presence near the A-pillar. Verify bracket weight rating and confirm the housing doesn't obstruct your sightline from the driver's seat before committing to a 6-inch ditch setup.
Wiring: Single Pair vs Combined with Bumper Pods
Wiring a single pair of ditch lights follows the same process as any pod light installation: positive to switched power or ACC circuit, negative directly to the battery negative terminal, DRL wire to ACC circuit for automatic daytime running. The included harness handles a single pair with no additional hardware.
The more involved scenario is running ditch lights alongside bumper pod lights — two pairs total. Here's how to think through that setup.
Two pairs with a multi-way switch panel (recommended)
A multi-way switch panel is the cleanest solution for any dual-pair build. The panel has its own ACC wire that powers the panel itself — from here, each channel controls one pair of lights independently. This gives you:
- DRL on a single switch — wire both pairs' DRL circuits to the same switch channel on the panel. One tap activates both DRL rings together when the ignition is on, without any extra ACC wiring
- Main beam on separate switches — ditch lights on one channel, bumper pods on another, giving you independent control over which main beams are active in any situation
This is the approach we recommend for any build running two or more pairs. It keeps the cab clean, gives you full flexibility, and makes future additions straightforward.
Two pairs, direct ACC tap (no panel)
If a switch panel isn't part of your build, both DRL circuits can share the same ACC tap — both pairs activate together when the ignition is on. Main beams still require separate switches. This is the simpler approach but gives you less flexibility over which lights are active in different situations.
DRL management with two pairs
Running DRL on both ditch lights and bumper pods simultaneously is common and creates a clean visual presence on the street. Whether you're using a switch panel or a direct ACC tap, both DRL circuits activate together automatically. If you're running HALO PRO dynamic DRL across two pairs and want the animations synchronized, see our DRL guide for the full sync procedure using the switch panel.
Installation walkthrough
The following installation video covers the HALO PRO wiring process — the same harness and connection sequence applies to ditch light mounting:
NOVSIGHT HALO 3-Inch: Three Options for Ditch Setups
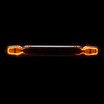
All three HALO Series variants are available in 3-inch and share the same IP68 housing, making them equally suited to the ditch mount position from a durability standpoint. The differences that matter for a ditch setup come down to beam flexibility, DRL type, and build aesthetic.
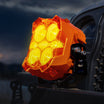
HALO Standard 3-inch — recommended for most ditch builds
The only pod light in this size category with 5 beam modes: combo, spot, driving, flood, and fog. For a ditch setup, this means you can run combo for most trail use, switch to spot for open high-speed terrain, and switch to driving for mixed road-trail conditions — all from one set of lights. Yellow/white switchable DRL for all-condition visibility. 48W, 3,450 lumens per light.
| Size | Power | Lumens / light | Beam modes | DRL | Price / pair |
|---|---|---|---|---|---|
| 3-inch | 48W | 3,450 lm | 5 modes | Yellow / White | $329 |
HALO PRO 3-inch — for builds where DRL is part of the identity
Same 48W output and spot/combo beam modes as the Standard. The differentiator is the 7 dynamic sequential DRL modes — if your ditch lights are as much a visual signature as a functional tool, the PRO delivers an animated DRL that no static ring can match. Particularly effective when running ditch lights alongside bumper pods, where the coordinated animation across both pairs creates a cohesive front-end look.
| Size | Power | Lumens / light | DRL modes | Price / pair |
|---|---|---|---|---|
| 3-inch | 48W | 3,450 lm | 7 dynamic modes | $399 |
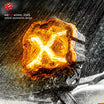
HALO SE 3-inch — for stealth and blacked-out builds
Full-black housing with no silver trim ring, red/white switchable DRL. The SE delivers the highest lumen output in the 3-inch category at 60W and 6,120 lumens per light. For blacked-out rigs where the ditch lights need to disappear into the build when they're off and make a statement when they're on, the SE is the only option that delivers both.
| Size | Power | Lumens / light | DRL | Price / pair |
|---|---|---|---|---|
| 3-inch | 60W | 6,120 lm | Red / White | $259 |
Which one to choose
| Standard | PRO | SE | |
|---|---|---|---|
| Best for | Mixed terrain, all-condition use | Visual builds, show rigs | Stealth / blacked-out builds |
| Beam modes | 5 modes | 2 modes | 2 modes |
| DRL | Yellow/White static | 7 dynamic modes | Red/White static |
| Output | 3,450 lm | 3,450 lm | 6,120 lm |
| Price / pair | $329 | $399 | $259 |
Frequently Asked Questions
Do ditch lights require a special bracket?
Yes, in most cases. Trucks like the Tacoma and F-150 have natural hood creases that work with bolt-on ditch brackets — no drilling required. Jeeps typically use A-pillar clamp brackets instead. Universal ditch brackets are available for most popular platforms. Always confirm the bracket is rated for your pod light's weight before mounting.
Are ditch lights legal to use during the day?
The DRL function on ditch lights is road-legal in all US states — it operates as a low-power daytime running light. The main beam is classified as auxiliary off-road lighting in most states and should be switched off on public roads. Running DRL-equipped ditch lights on the street is the standard daily-use configuration.
Is one pair of ditch lights enough?
For most builds, yes. A single pair covers the key side-forward blind spot on both sides. Running ditch lights alongside bumper pods gives the most complete front-hemisphere coverage, but ditch lights alone make a meaningful difference on winding and technical terrain.
What is the difference between ditch lights and A-pillar lights?
Same function, different mount point. Ditch lights mount on the hood crease near the A-pillar base — common on trucks with pronounced hood lines. A-pillar lights mount directly on the A-pillar using a clamp bracket — more common on Jeeps. The illumination angle and purpose are identical; the terms are often used interchangeably.
Will ditch light brackets damage my hood paint?
Quality brackets include rubber or foam padding on all contact points. Best practice: clean the contact area before installation, use the included padding, check bracket torque after the first few off-road runs, and inspect contact points seasonally. Vibration over time can cause wear if padding compresses and bracket movement is not caught early.
Ready to Build Your Ditch Light Setup?
- Mixed terrain, all-condition use → HALO Standard 3-inch — 5 beam modes, yellow/white DRL
- Visual build, dynamic DRL → HALO PRO 3-inch — 7 dynamic sequential DRL modes
- Stealth / blacked-out rig → HALO SE 3-inch — full black housing, highest output in class
Running ditch lights alongside bumper pods? Browse our switch panel lineup for clean multi-pair control. Questions about fitment or wiring for your specific vehicle, reach out at service@novsight.com.
Want to go deeper on pod light selection? Start with our full LED pod lights buyer's guide or read about choosing the right DRL setup for your build.
Last updated: May 2026
Leave a comment
All comments are moderated before being published.
This site is protected by hCaptcha and the hCaptcha Privacy Policy and Terms of Service apply.